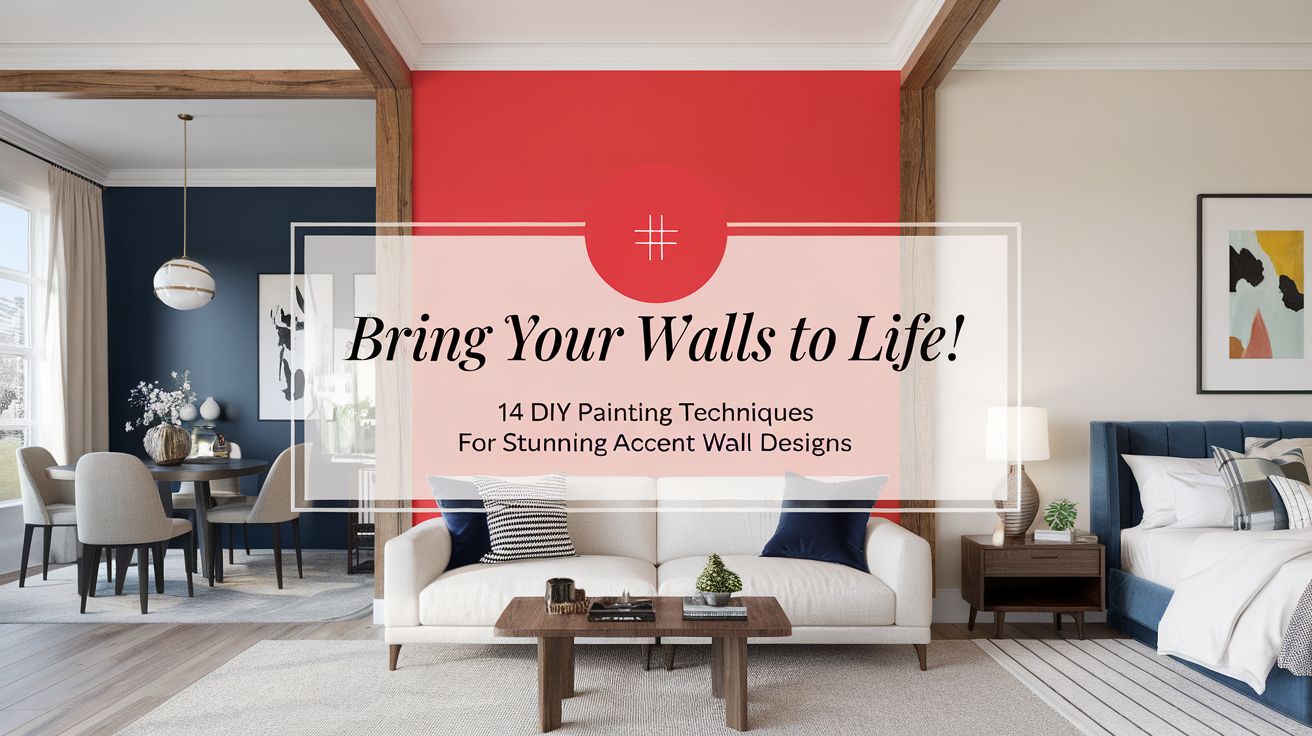
Is your space screaming for a splash of personality? Ready to transform those bland walls into a canvas of creativity? Dive into these 14 wild and wacky DIY painting techniques that will make your home the talk of the town. Whether you’re aiming for a chic dining room accent wall or a funky teen lounge, we’ve got you covered!
1. The Drunken Zebra (Tape Resist Painting)
Why settle for straight lines when you can have zigzags that look like they’ve had a bit too much fun?
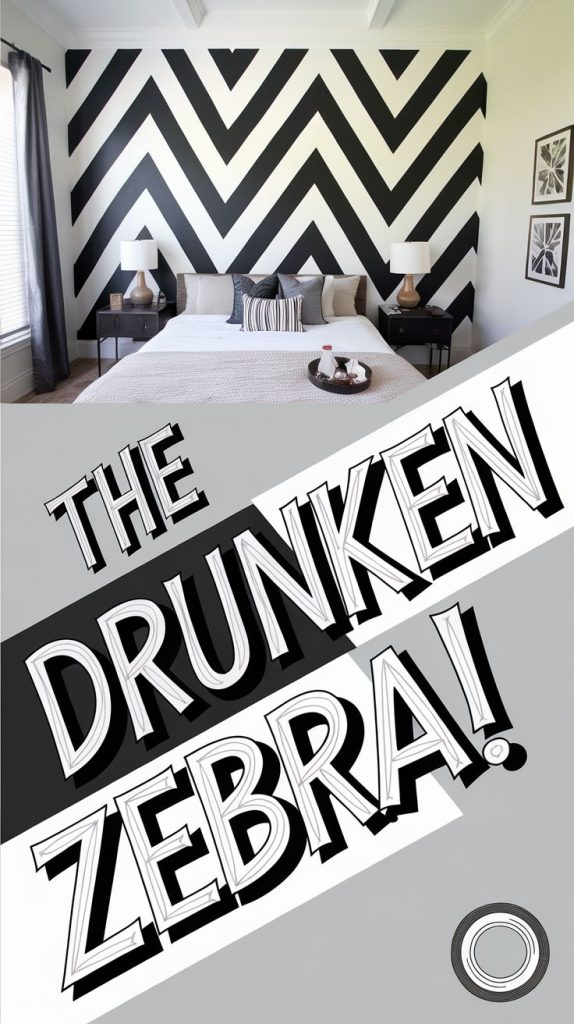
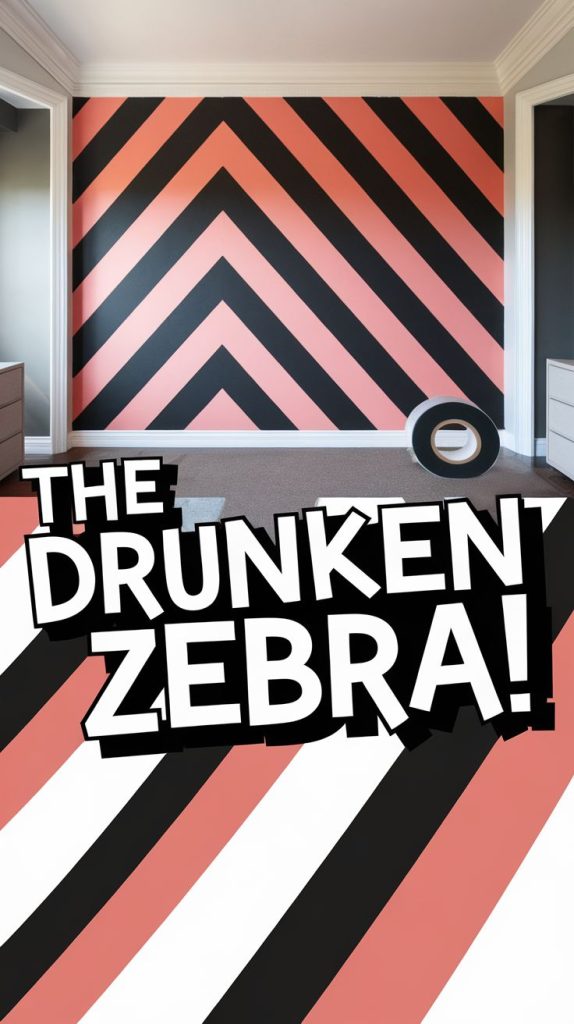
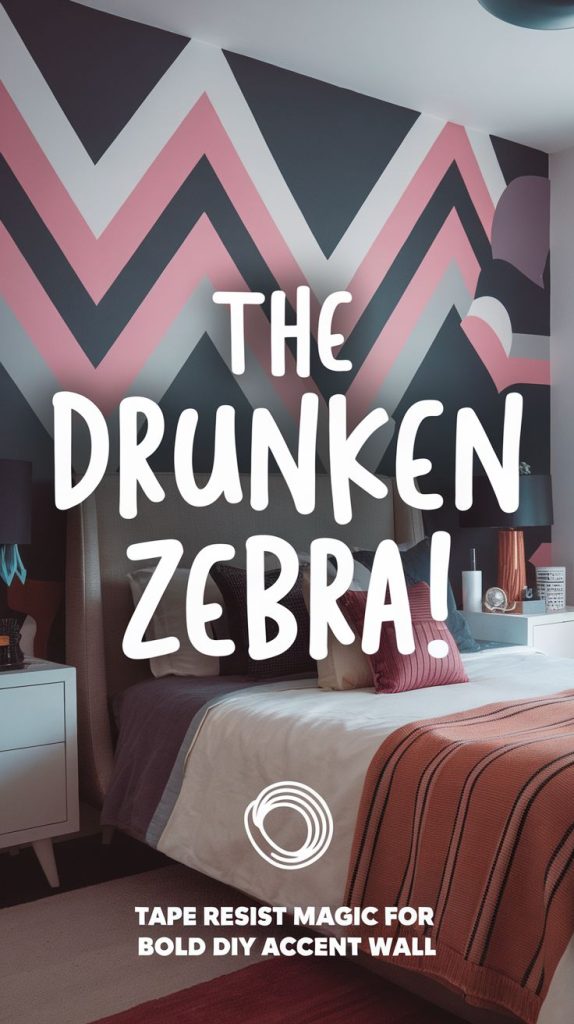
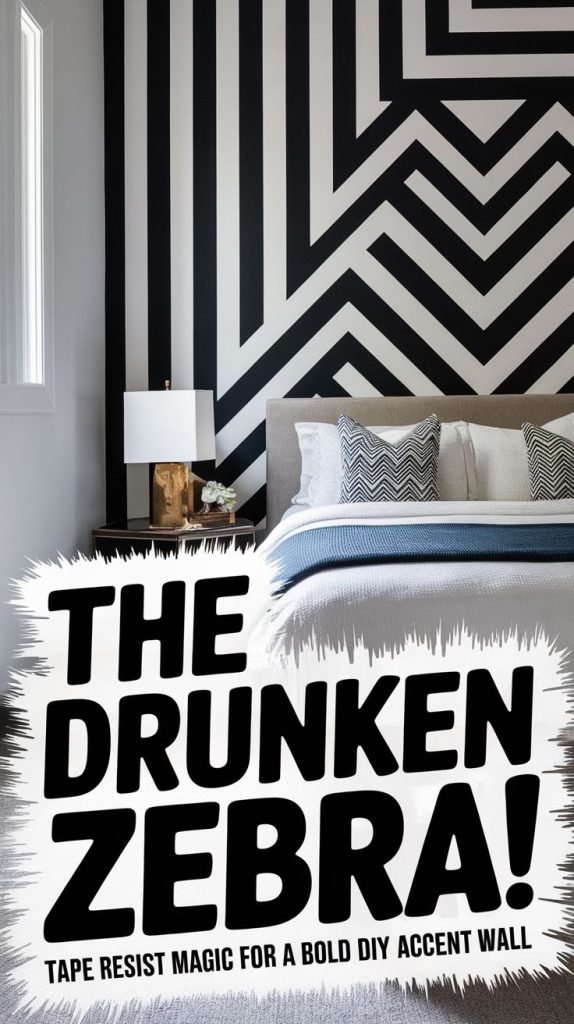
- What You’ll Need: Painter’s tape, your favorite colors, and a sense of adventure.
- How-To: Apply the tape in random zigzag patterns, paint over the entire wall, and once dry, remove the tape to reveal your masterpiece.
📸 Picture This: A teen lounge that looks like a modern art exhibit with bold, crisscrossed stripes in vibrant colors.
🎨 Bonkers Tip: Use glow-in-the-dark paint for extra nighttime magic!
2. Galactic Splatter (Splatter Painting)
Unleash your inner Jackson Pollock and create a universe on your walls.
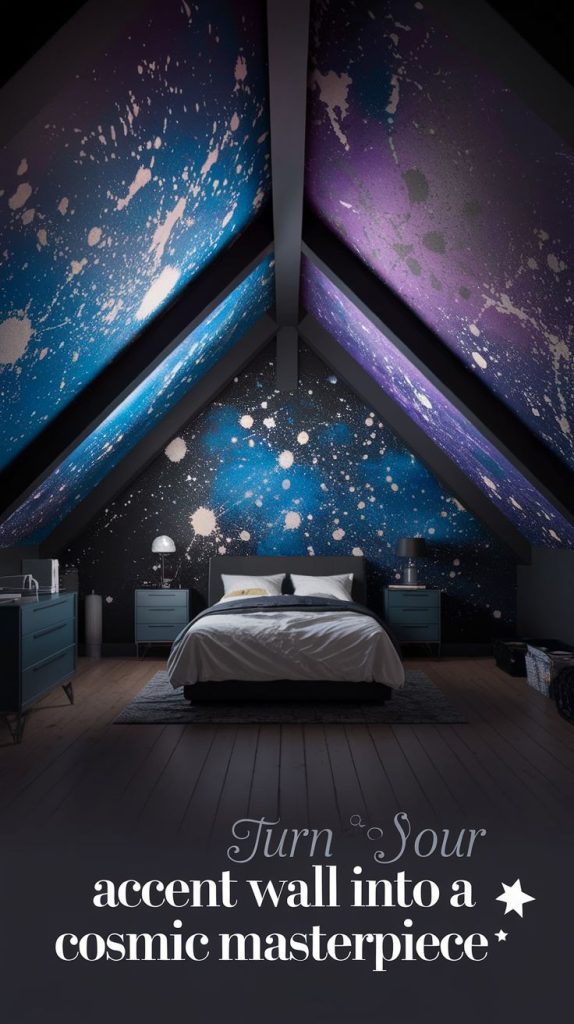
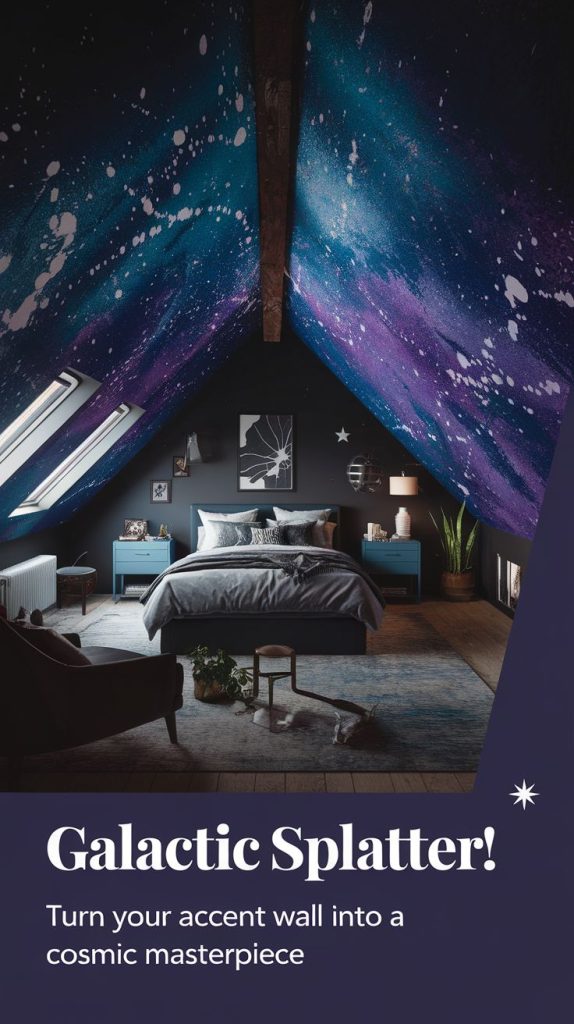
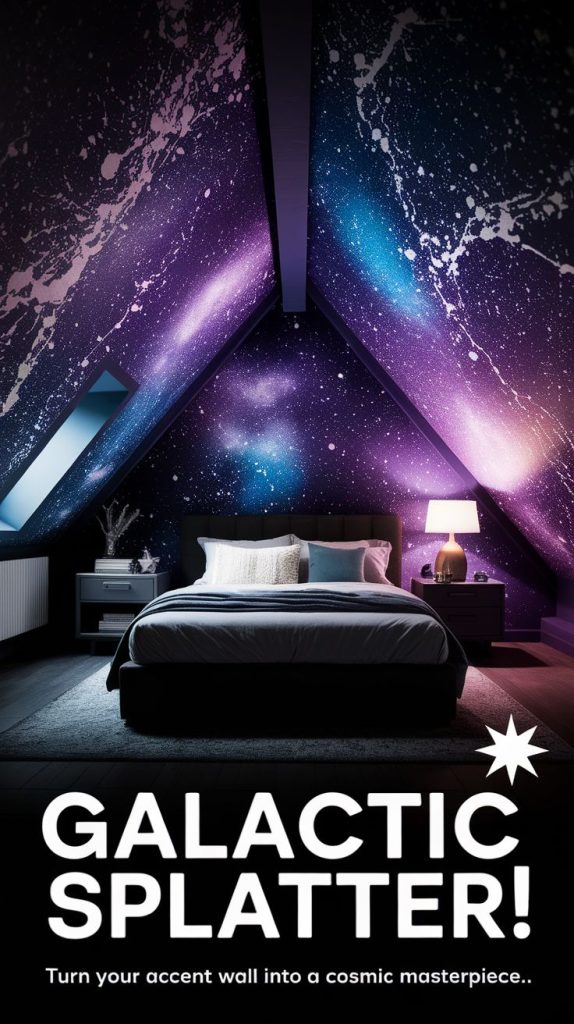
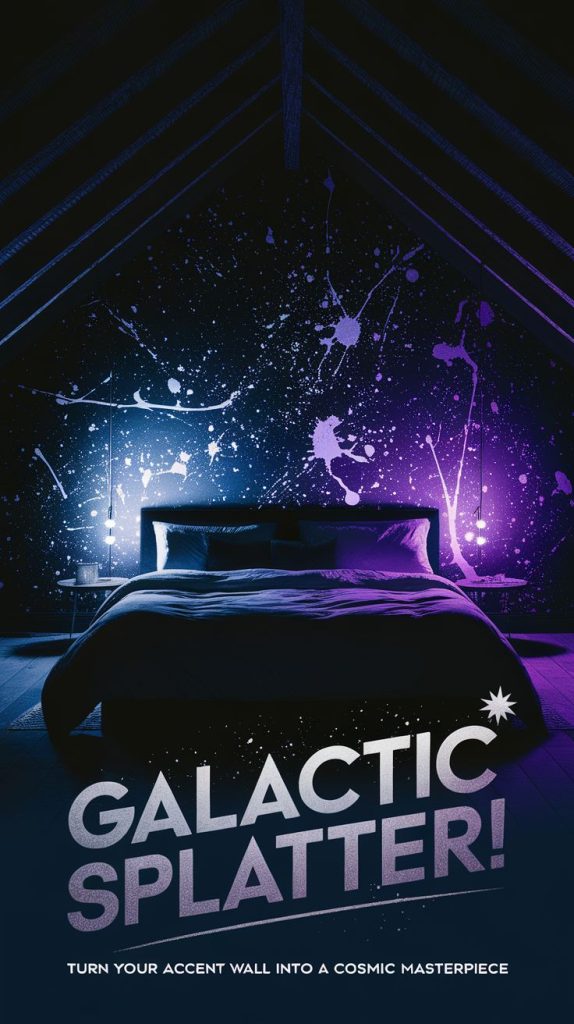
- What You’ll Need: Multiple paint colors, brushes, and a willingness to get messy.
- How-To: Dip your brush into the paint and flick it onto the wall, layering colors to create depth.
📸 Picture This: A deep blue wall speckled with white, purple, and silver, resembling a cosmic galaxy.
🎨 Bonkers Tip: Flick paint using a toothbrush for a fine, starry-night effect!
3. Ombre Extravaganza (Ombre Effect)
Because who doesn’t love a gradient that goes from mild to wild?
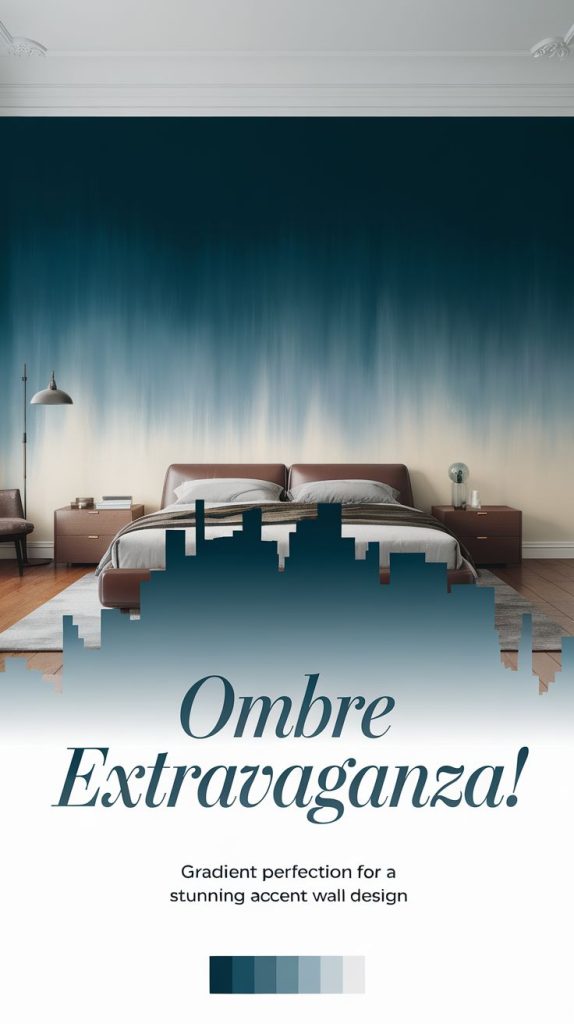

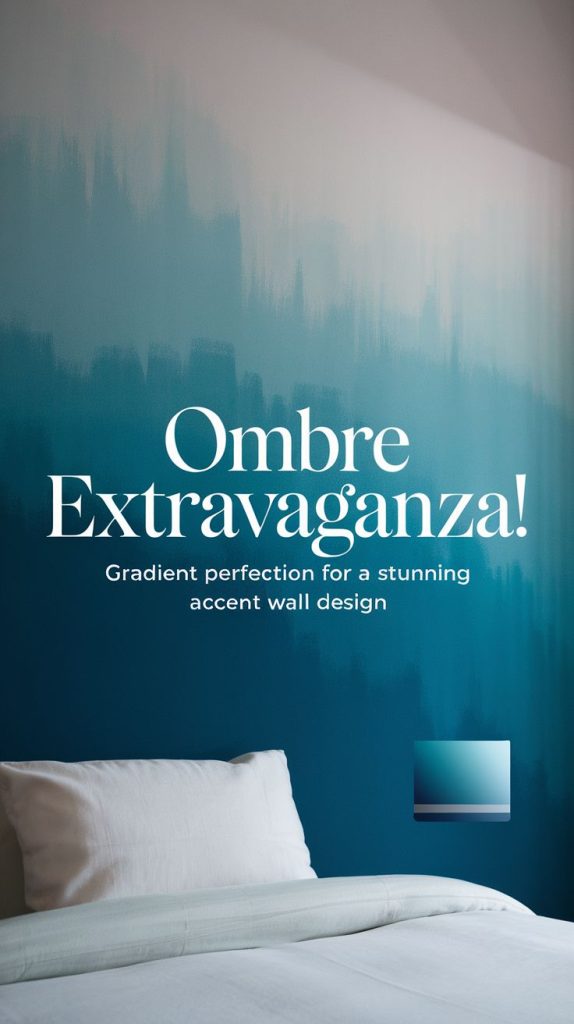
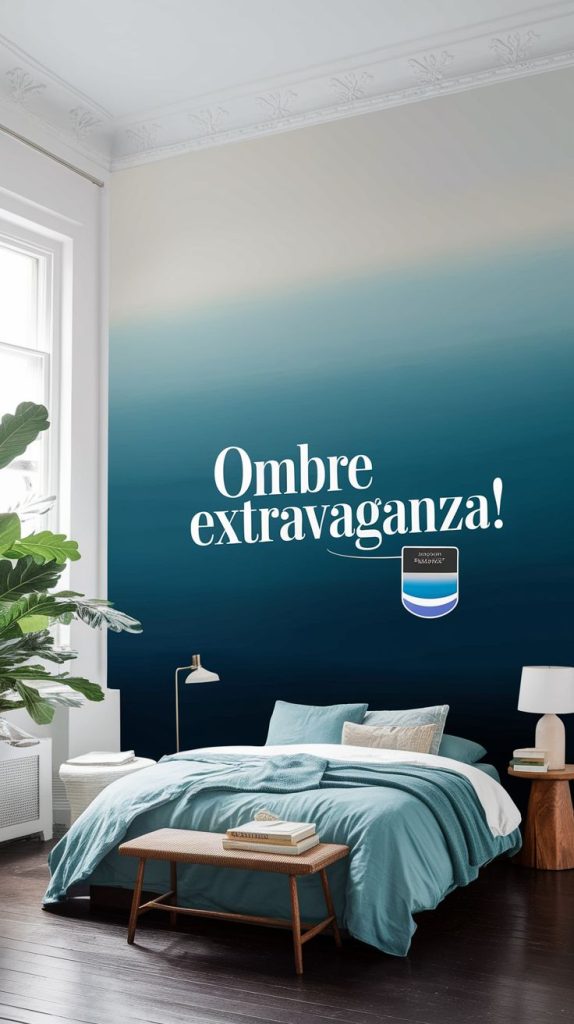
- What You’ll Need: At least two shades of the same color, brushes, and a spray bottle with water.
- How-To: Start with the darkest shade at the bottom, gradually blending into the lighter shade as you move up.
📸 Picture This: A bedroom accent wall that shifts from deep teal at the base to a soft sky blue at the top.
🎨 Bonkers Tip: Use a sponge instead of a brush for ultra-smooth blending.
4. Stencil Shenanigans (Stencil Art)
Why freehand when you can stencil your way to perfection?
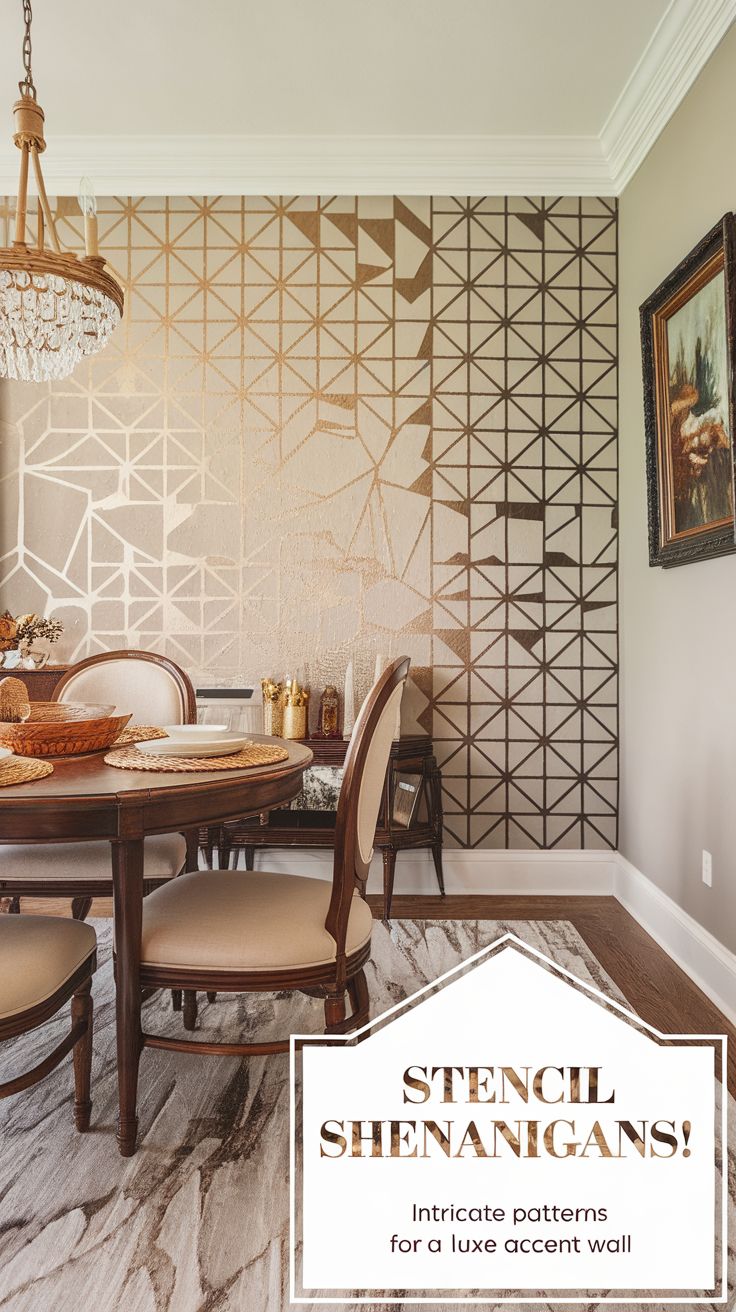
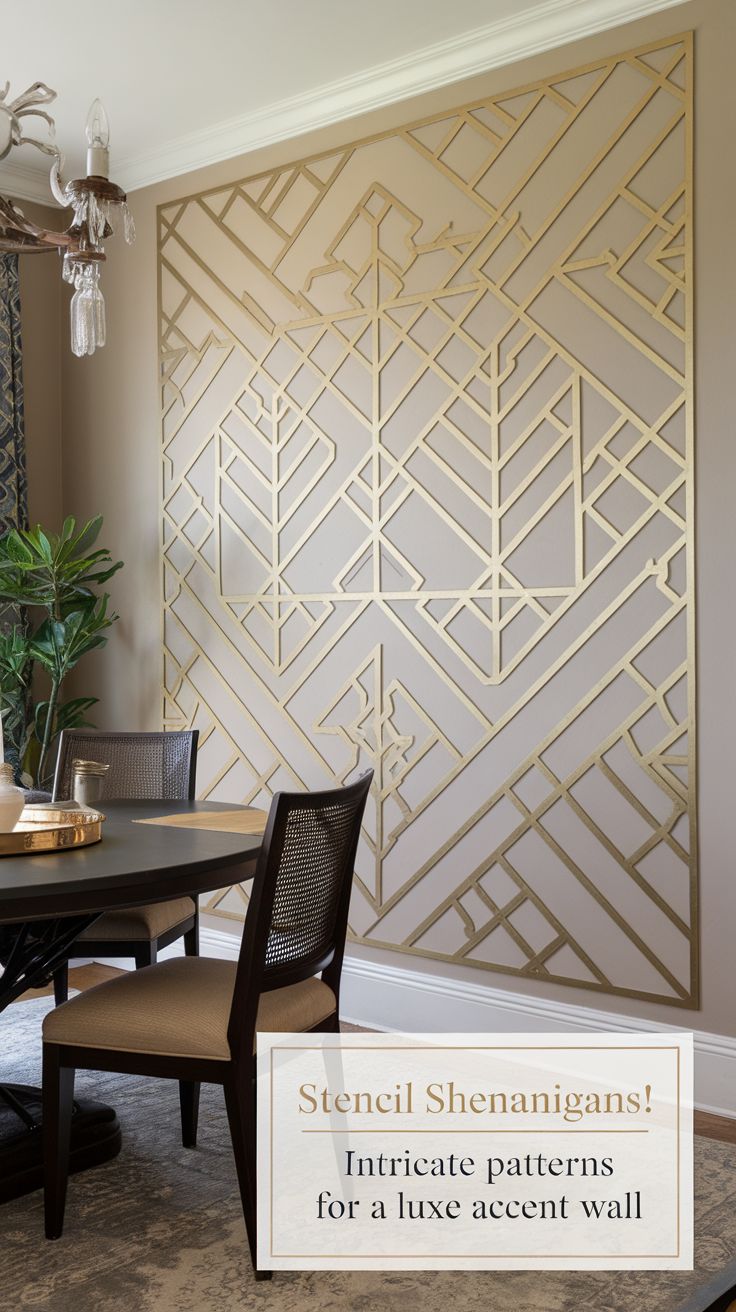

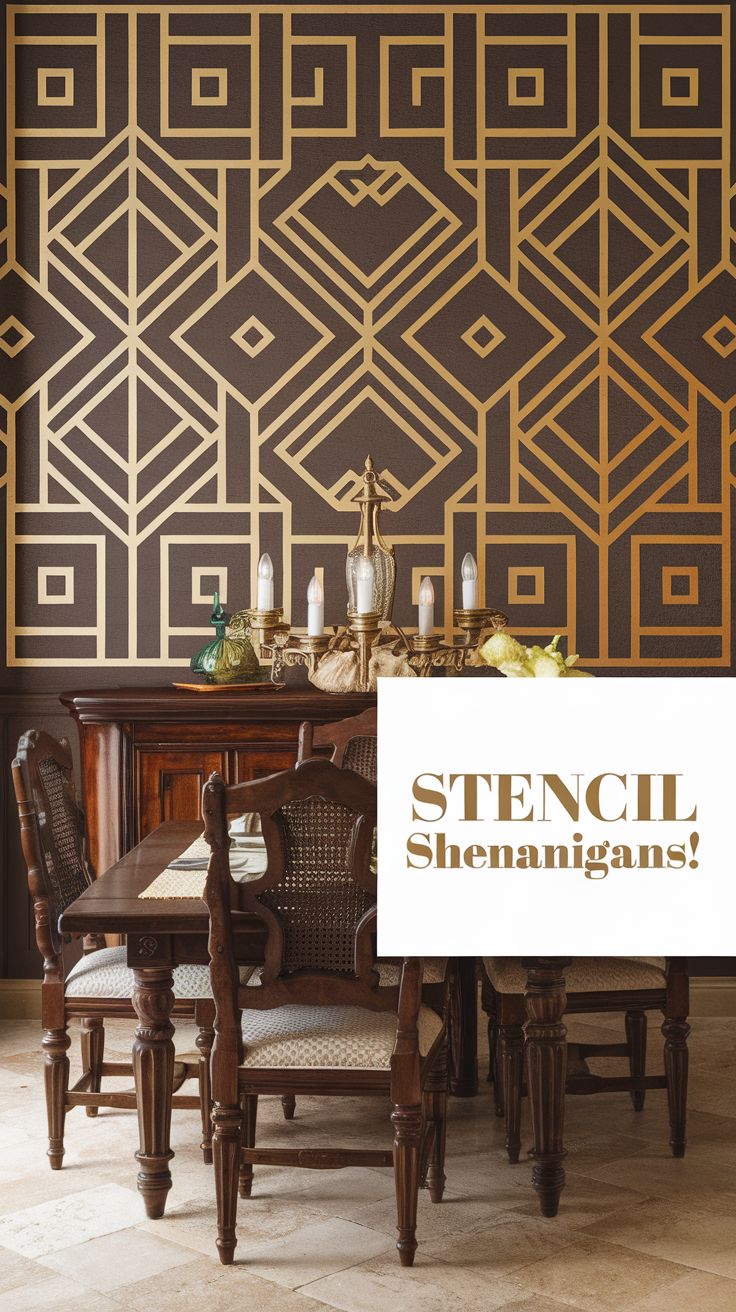
- What You’ll Need: Stencils of your choice, paint, and a sponge.
- How-To: Secure the stencil on the wall, dab paint over it with the sponge, and repeat to create patterns.
📸 Picture This: A sophisticated dining room accent wall covered in golden Art Deco stencils.
🎨 Bonkers Tip: Layer multiple stencil designs for a custom, one-of-a-kind look.
5. Sponge Bobbin’ (Sponge Dabbing)
Get that textured look without the hassle.
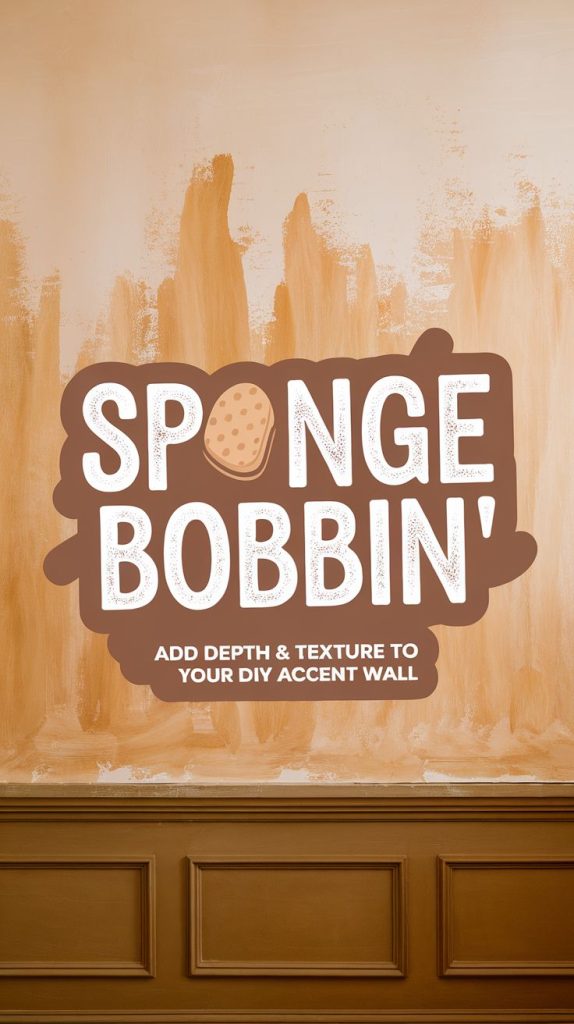


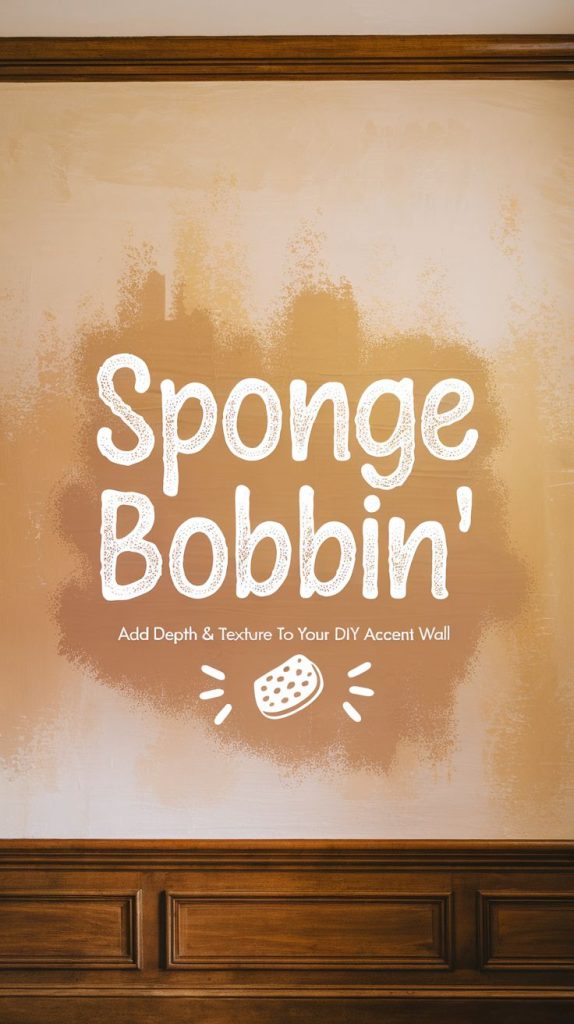
- What You’ll Need: A natural sponge, paint, and a steady hand.
- How-To: Dip the sponge into the paint, dab off excess, and gently press onto the wall to create a textured effect.
📸 Picture This: A cozy wood trim accent wall with a sponged-on stone texture.
🎨 Bonkers Tip: Mix two shades of the same color for added depth and dimension.
6. Color Block Party (Color-Blocking)
Why choose one color when you can have them all?


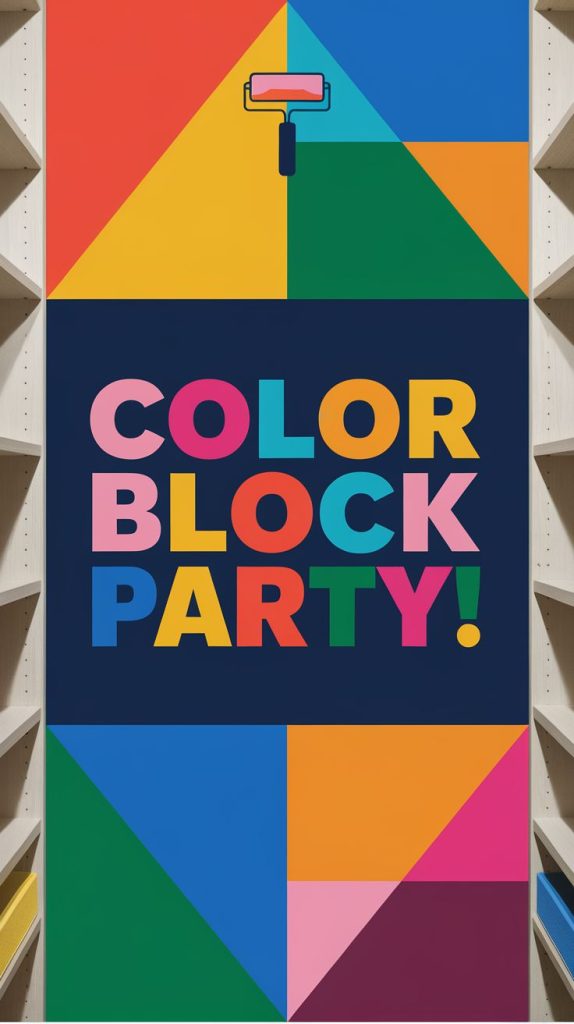
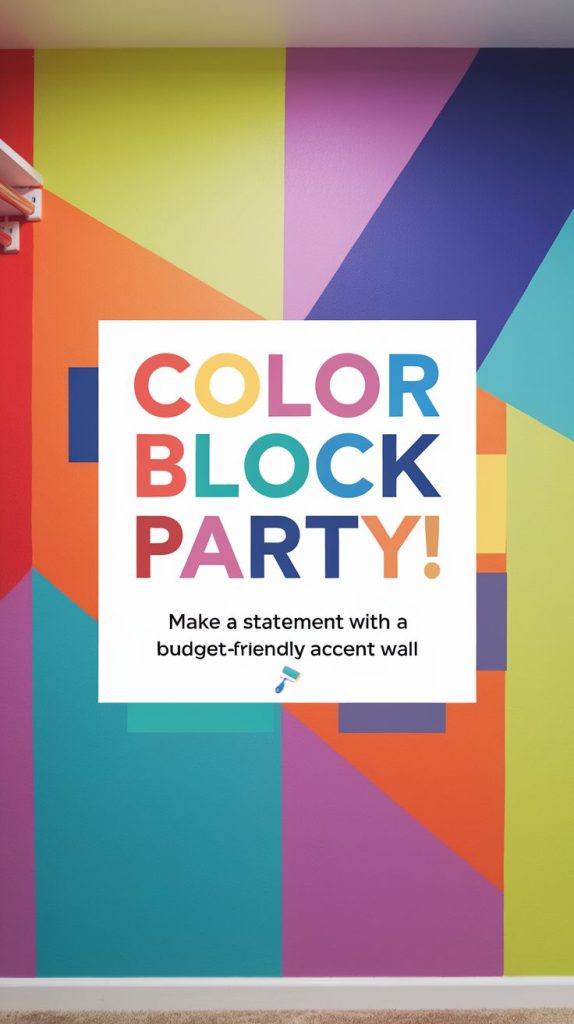
- What You’ll Need: Multiple paint colors, painter’s tape, and a wild imagination.
- How-To: Tape off sections of the wall and paint each in a different color, creating a bold, blocky design.
📸 Picture This: A closet room organizer space with pastel-colored rectangles popping against a neutral background.
🎨 Bonkers Tip: Try diagonal color blocks for an edgy, modern vibe.
7. Metallic Mayhem (Metallic Accents)
Add a touch of bling to your walls.
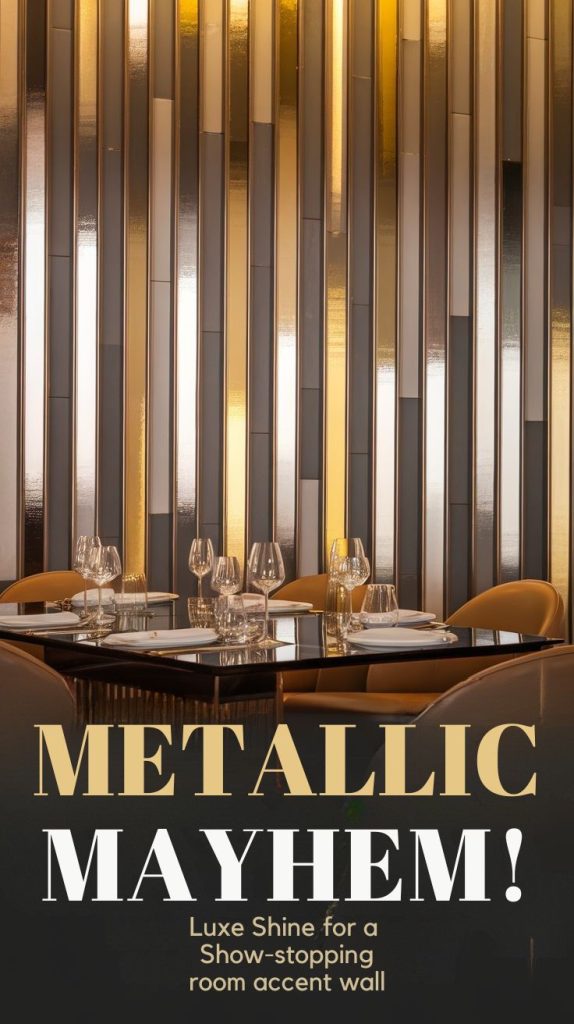
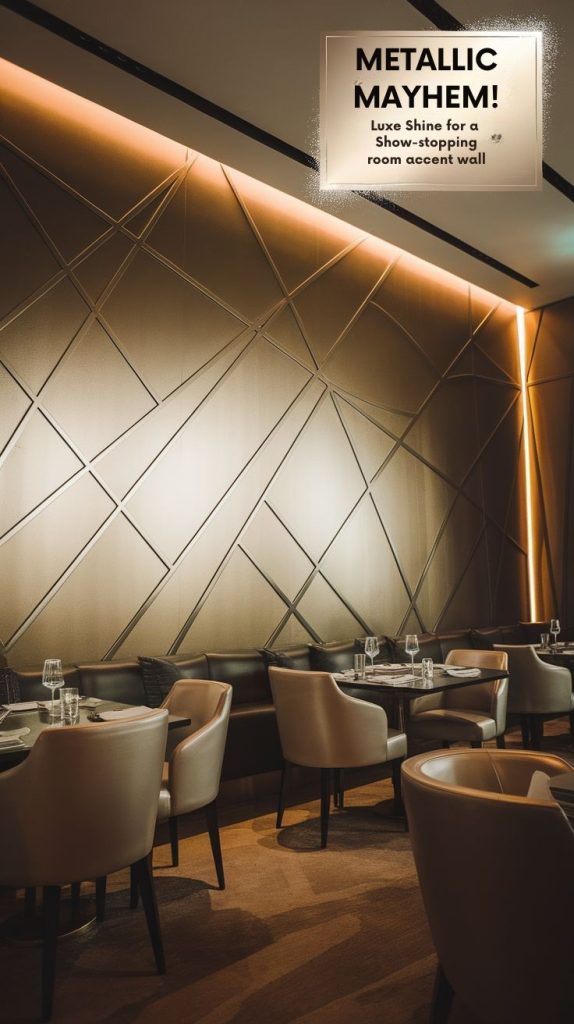

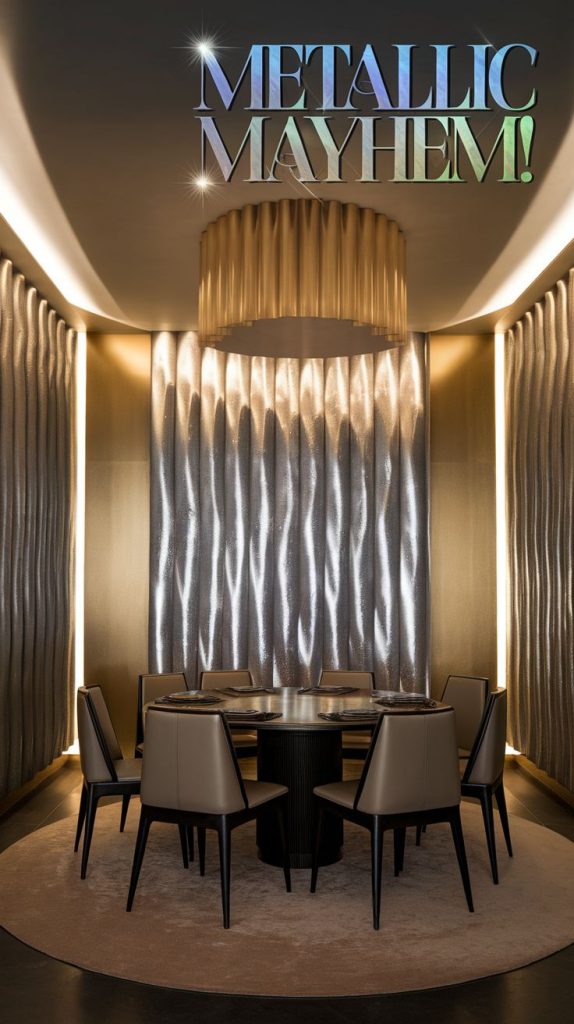
- What You’ll Need: Metallic paint, brushes, and a flair for the dramatic.
- How-To: Use metallic paint to highlight certain areas or create patterns that catch the light.
📸 Picture This: A dramatic dining room accent wall shimmering in gold highlights.
🎨 Bonkers Tip: Apply metallic paint with a sponge for a soft, brushed-metal effect.
8. Distressed Drama (Distressed Finish)
Make your walls look like they’ve lived a thousand lives.
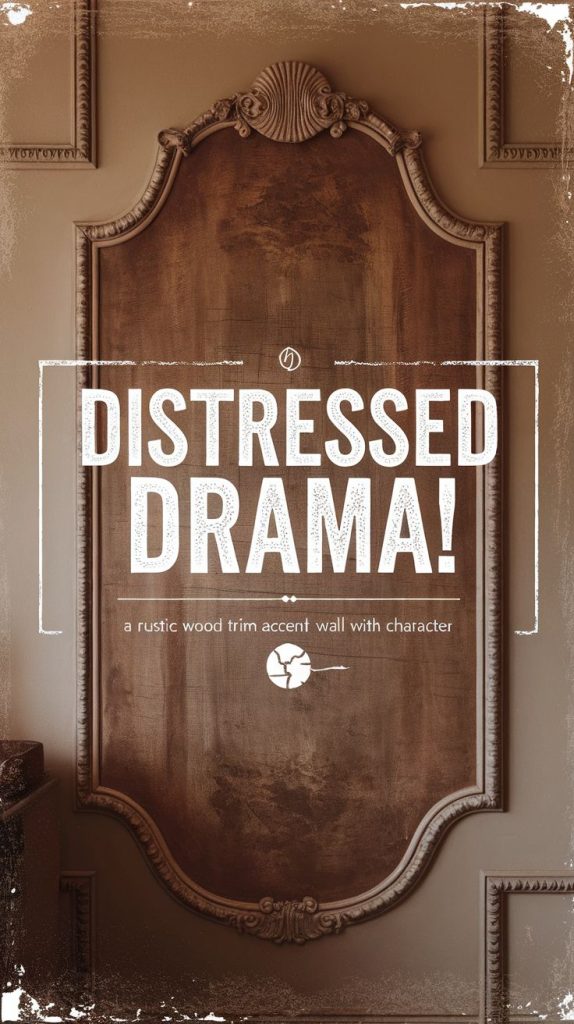
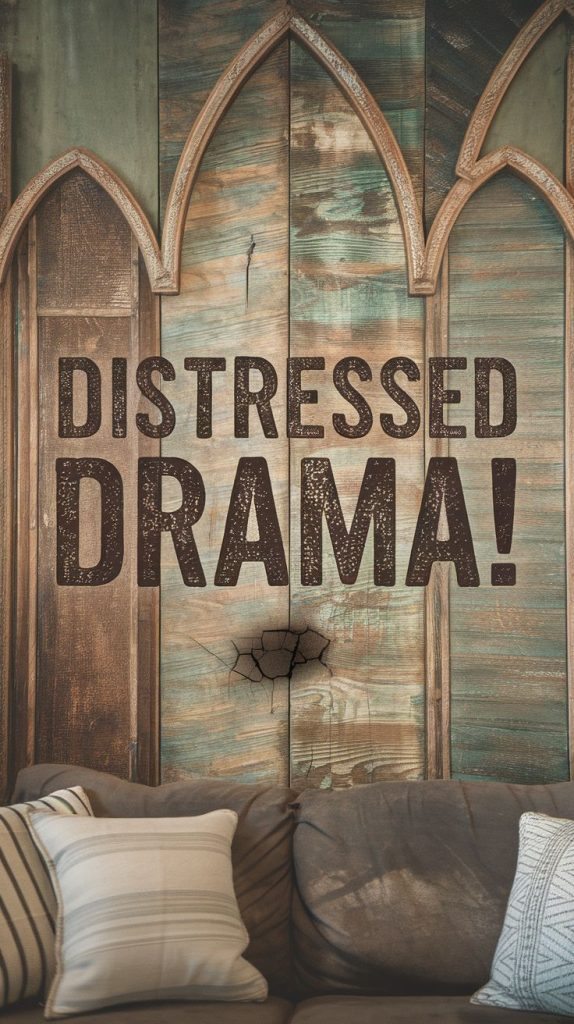
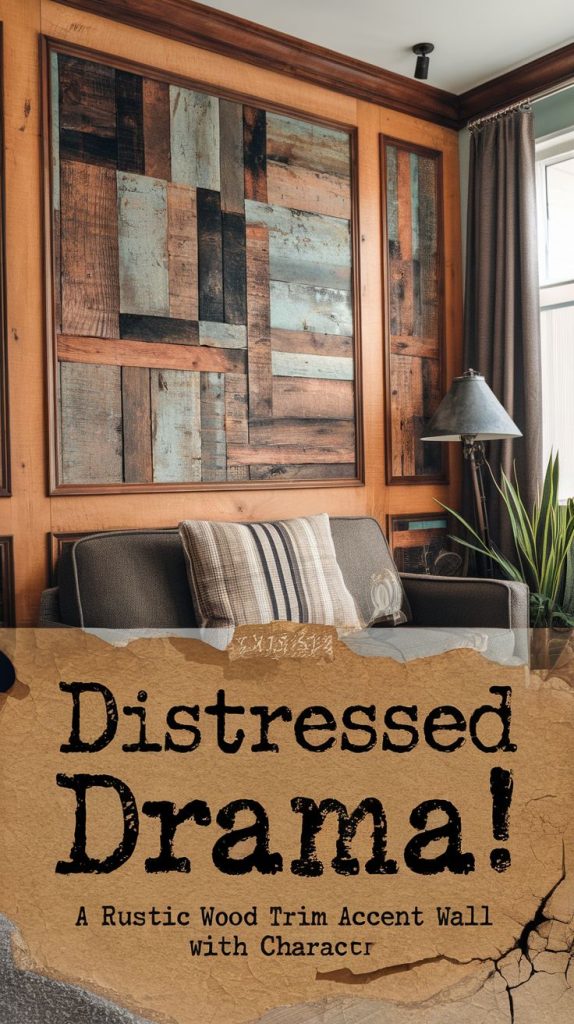

- What You’ll Need: Two contrasting paint colors, sandpaper, and elbow grease.
- How-To: Paint the wall in one color, let it dry, then paint over it with the second color. Once dry, sand areas to reveal the underlying color.
📸 Picture This: A vintage wood wall design in layered whites and browns, oozing rustic charm.
🎨 Bonkers Tip: Use candle wax between layers for an extra-chipped look.
9. Herringbone Hustle (Herringbone Pattern)
Turn your wall into a masterpiece of precision.
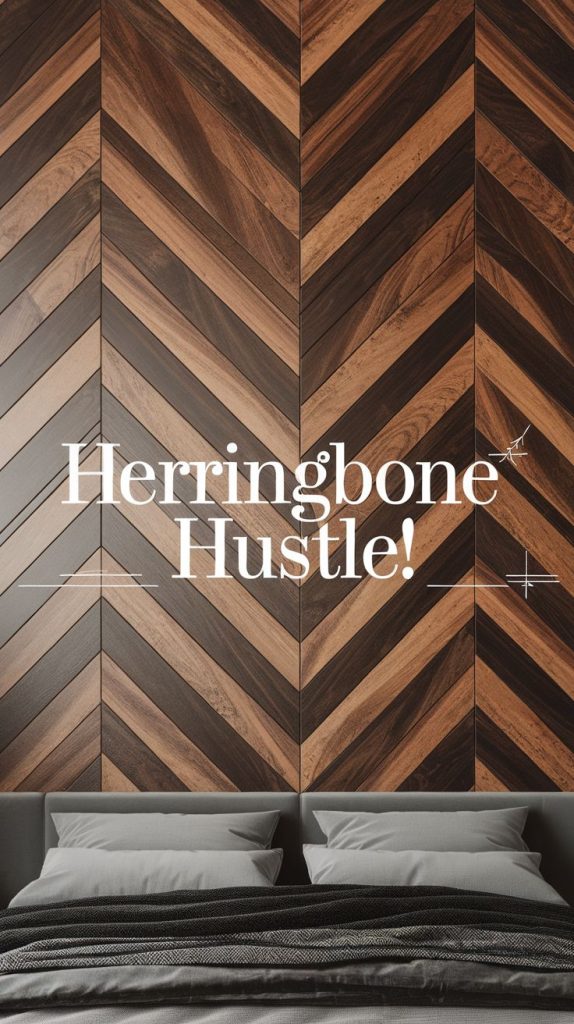
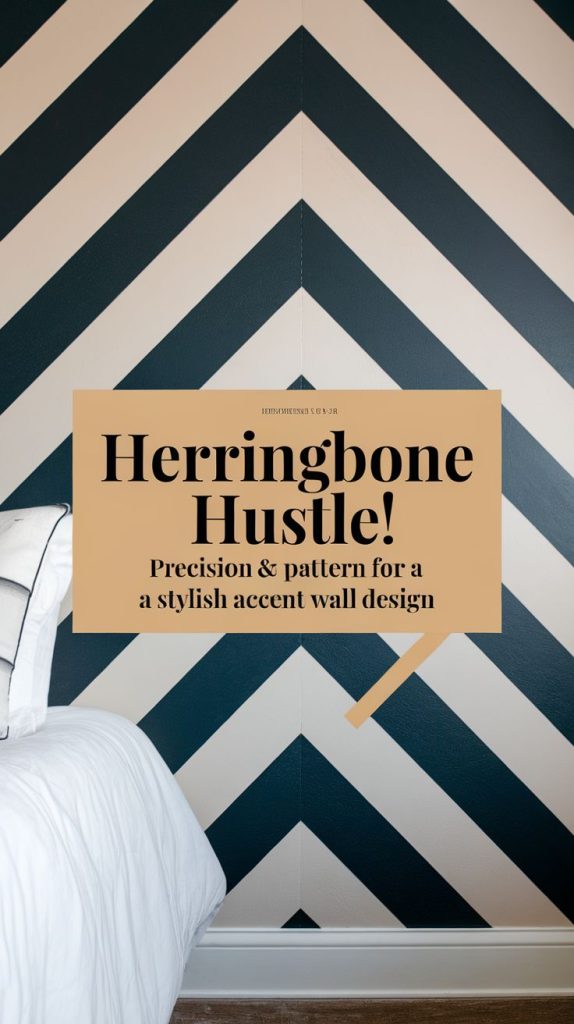
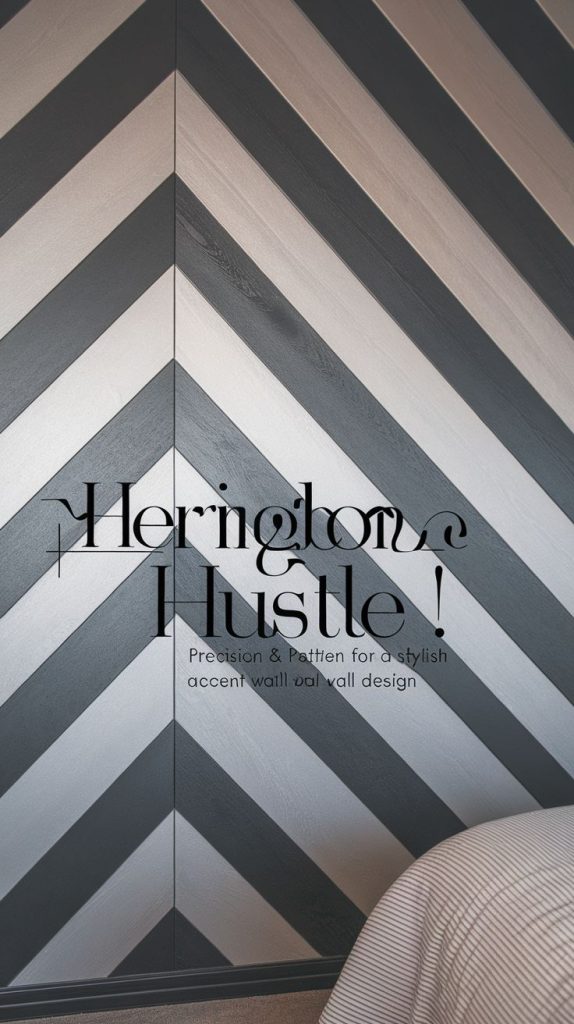
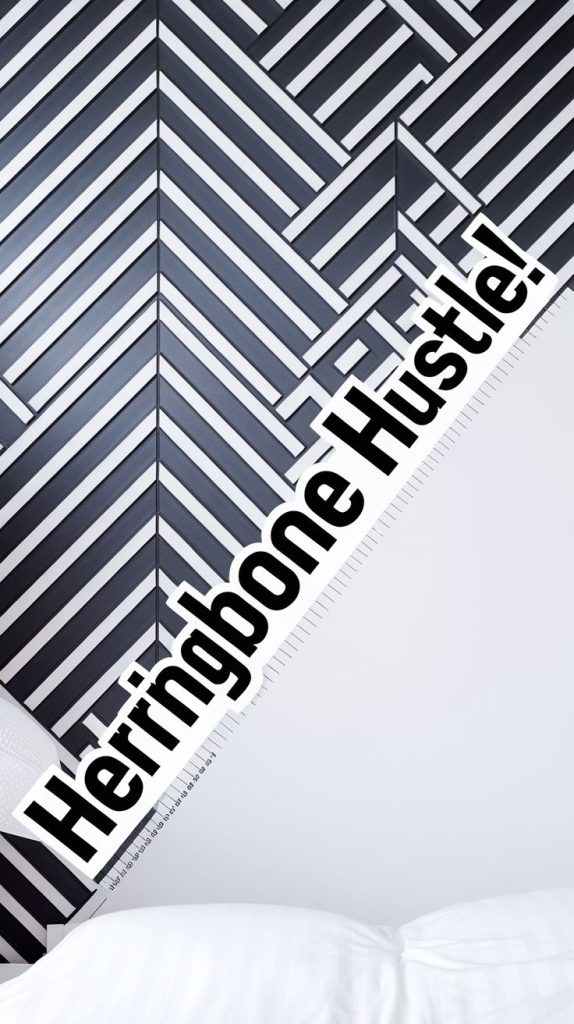
- What You’ll Need: Painter’s tape, a ruler, and a steady hand.
- How-To: Tape off a herringbone pattern, paint inside the shapes, and peel off the tape for a clean, modern design.
📸 Picture This: A stylish feature wall bedroom with sharp, dynamic angles.
🎨 Bonkers Tip: Try mixing different colors for a bold, artistic effect.
10. Watercolor Wonders (Watercolor Wash)
Soft, dreamy, and oh-so-pretty.


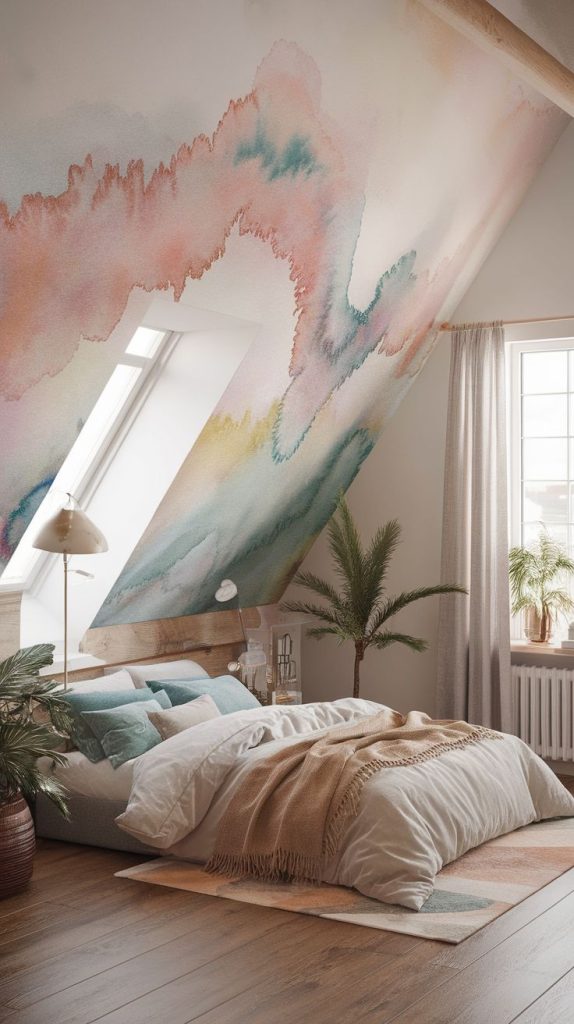
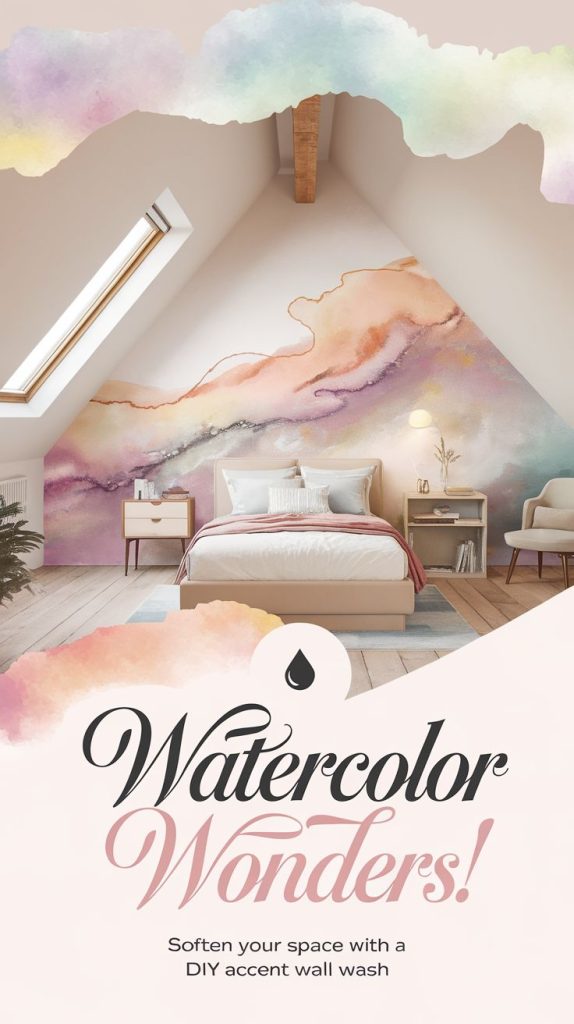
- What You’ll Need: Watered-down paint, brushes, and a light touch.
- How-To: Apply the diluted paint in broad strokes, allowing it to flow and blend naturally.
📸 Picture This: A serene attic bedroom design in soft pastel shades.
🎨 Bonkers Tip: Use a spray bottle with water for even softer blending.
11. Textured Triumph (Joint Compound Magic)
Who said walls have to be smooth?
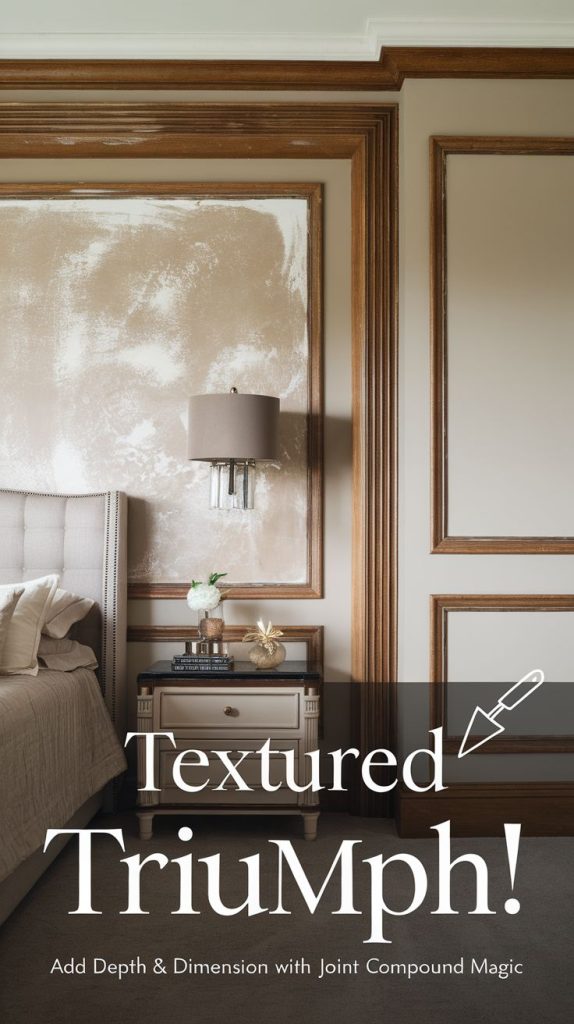
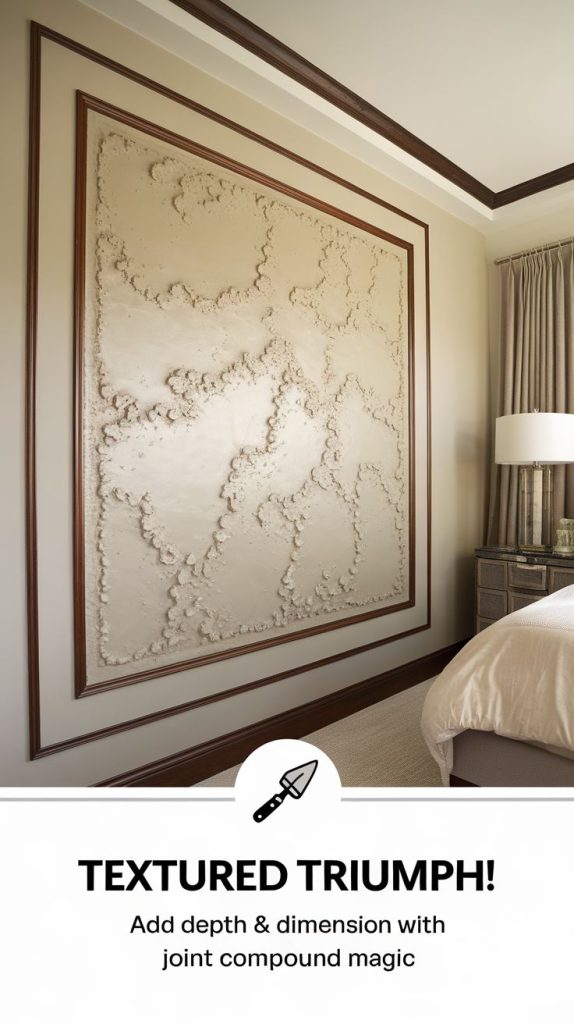
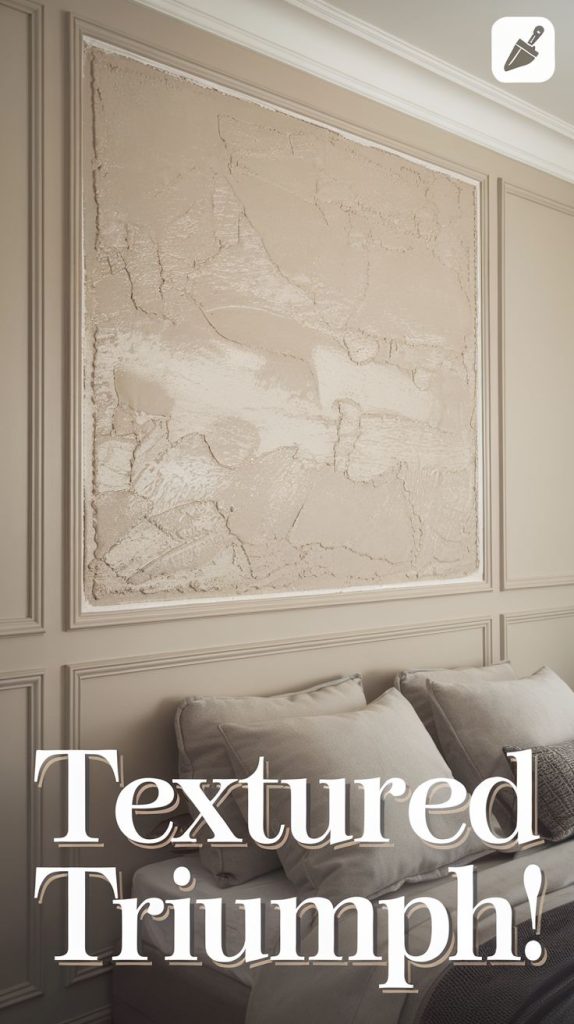
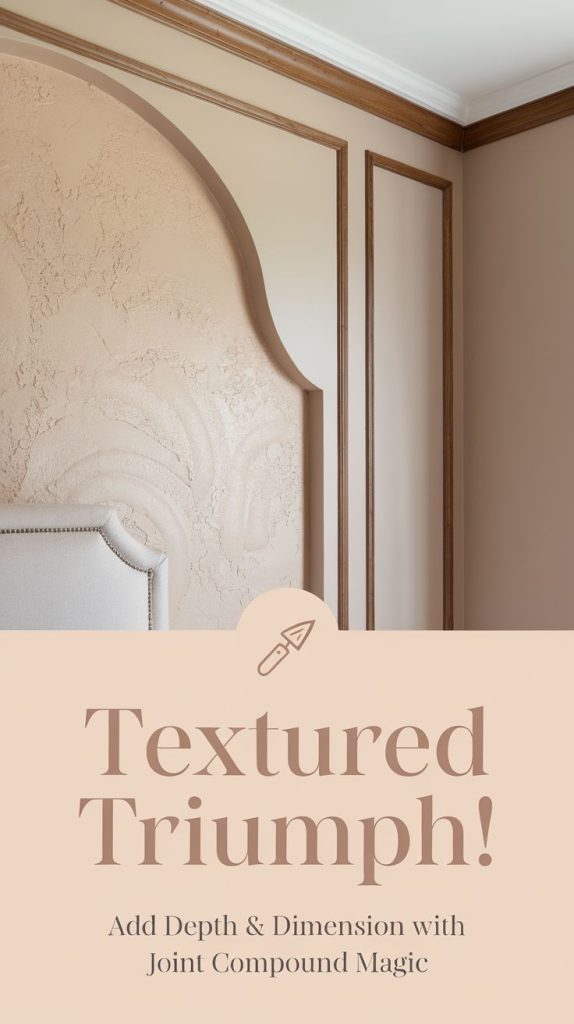
- What You’ll Need: Joint compound, a putty knife, and paint.
- How-To: Spread joint compound onto the wall with a putty knife and create a custom texture before painting over it.
📸 Picture This: A dramatic accent wall design that looks like Venetian plaster.
🎨 Bonkers Tip: Use a sponge to soften the edges for a more organic look.
12. Graffiti Glam (DIY Mural)
Channel your inner street artist.
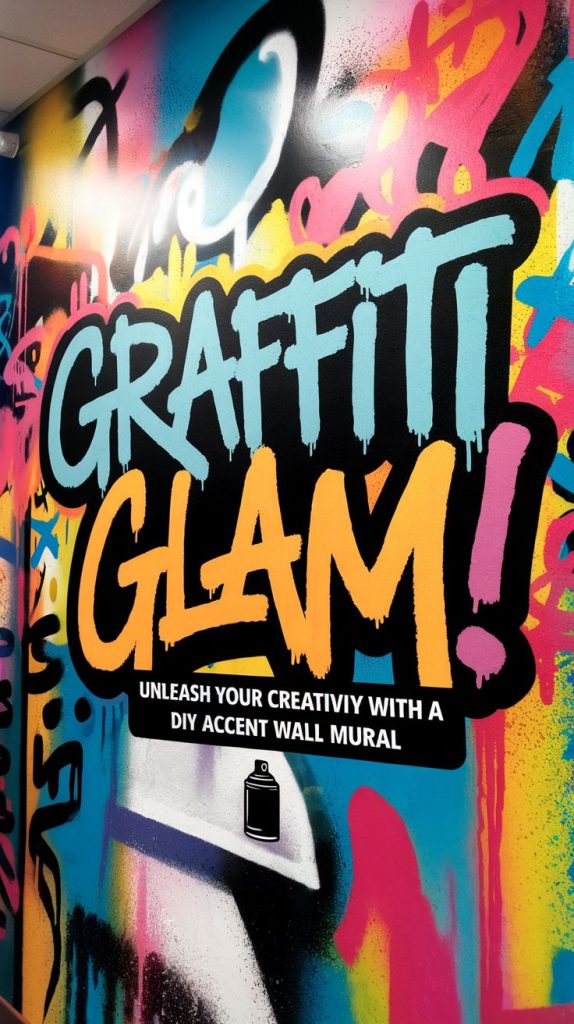
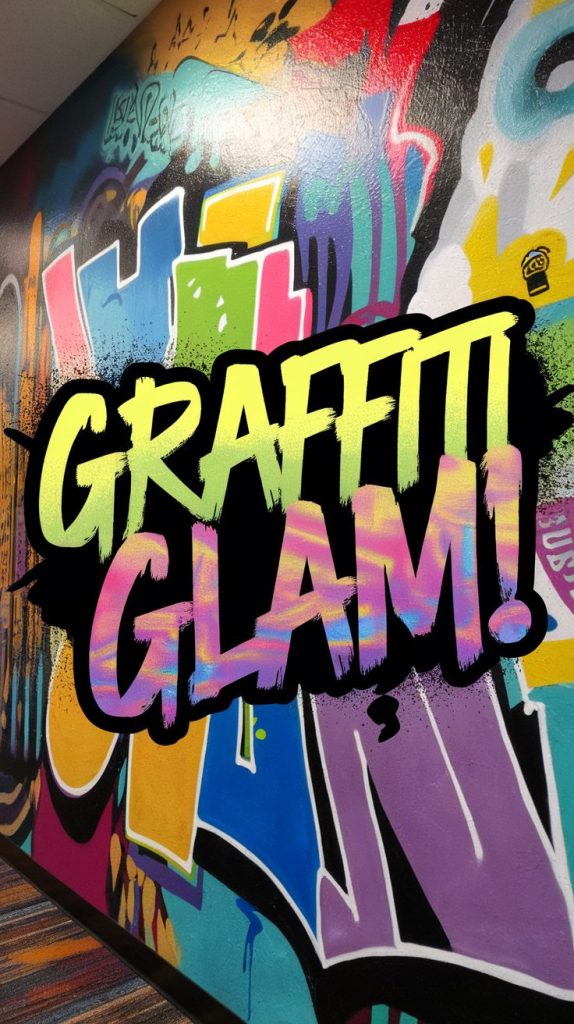
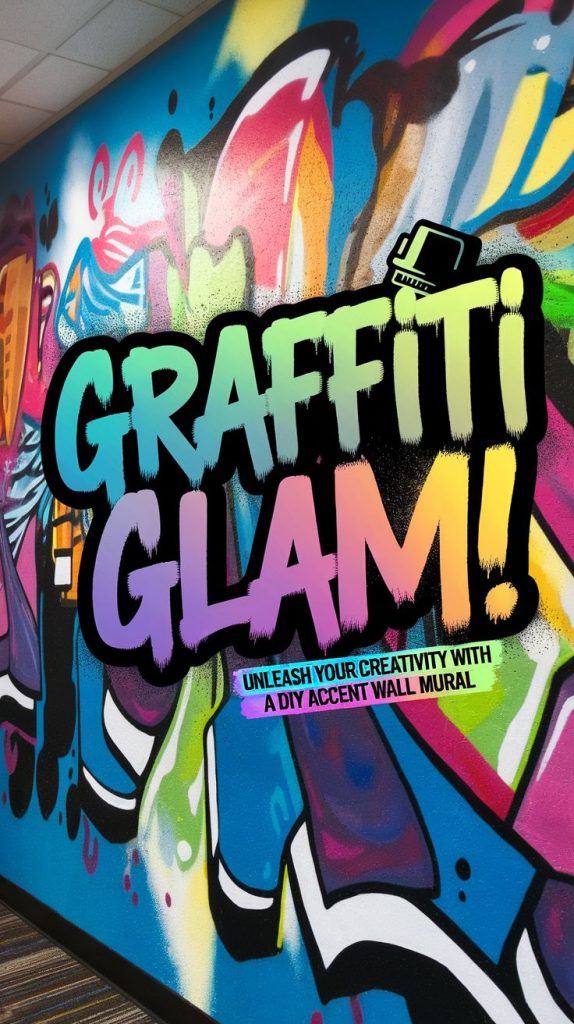
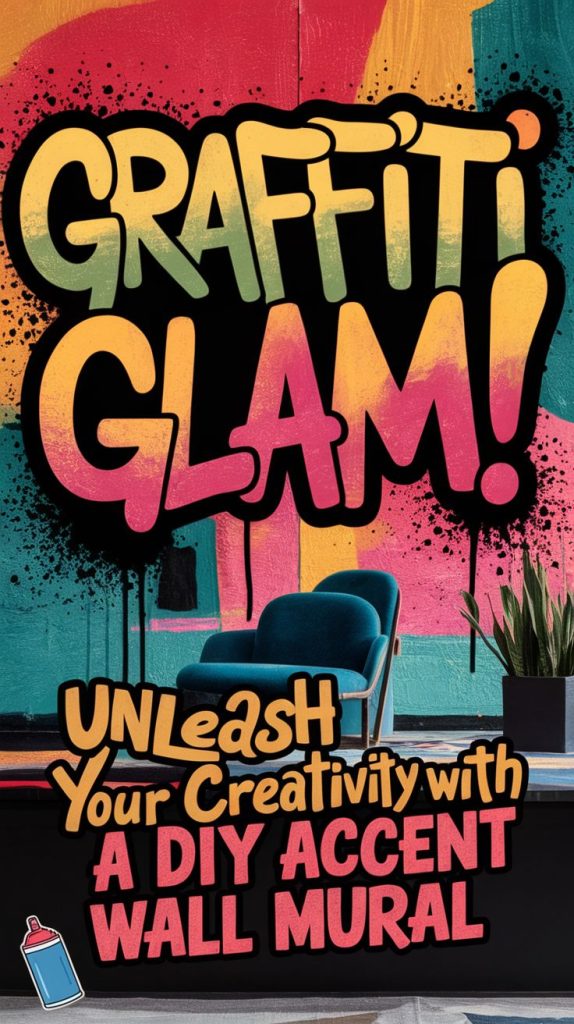
- What You’ll Need: Spray paints, stencils, and a rebellious spirit.
- How-To: Plan your design, then spray away to create a mural that’s uniquely yours.
📸 Picture This: A bedroom accent wall that breaks all the rules with bold graffiti art.
🎨 Bonkers Tip: Outline in black for an extra punchy, professional finish.
13. Confetti Carnival (Polka Dot Wall)
Make your walls a party!
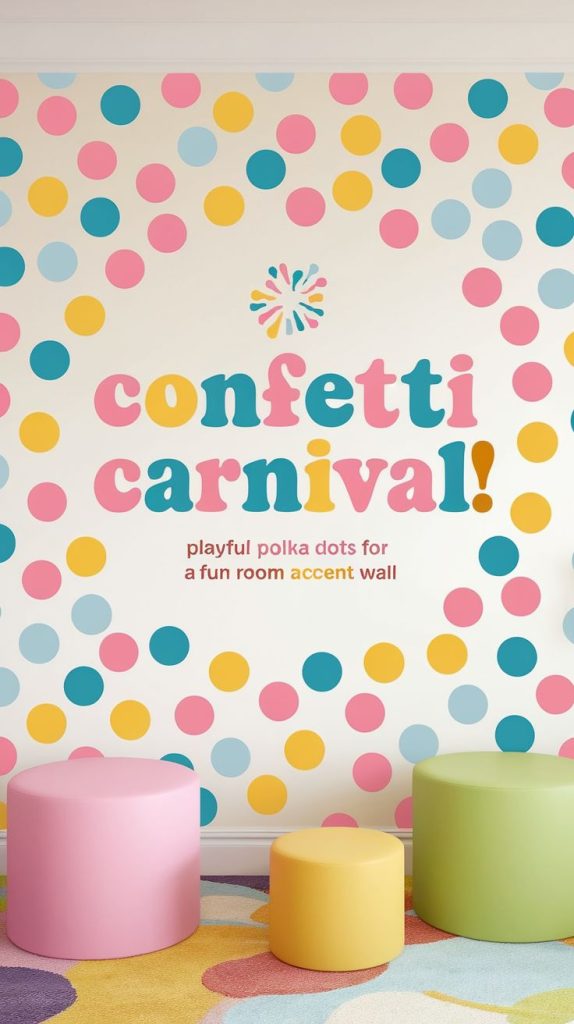

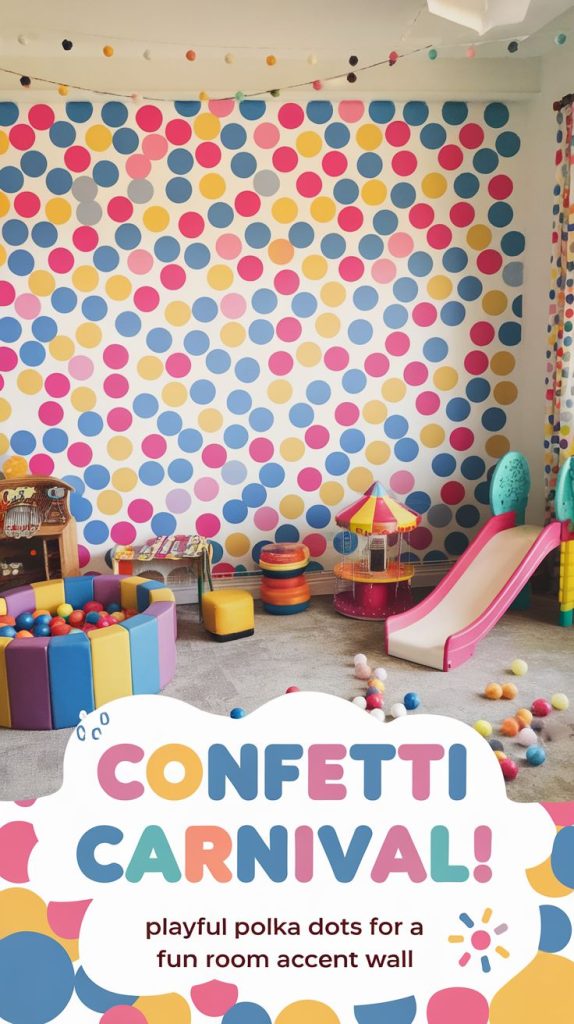
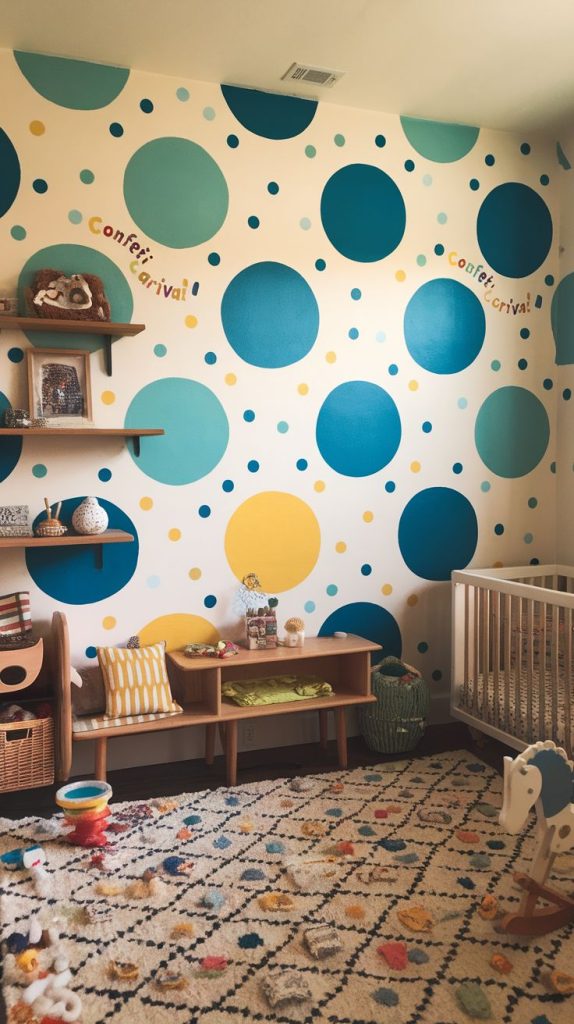
- What You’ll Need: Circular sponges, various paint colors, and a free spirit.
- How-To: Randomly stamp different-sized dots onto the wall.
📸 Picture This: A fun, youthful wall bursting with confetti-like energy.
🎨 Bonkers Tip: Use metallic or neon dots for a dazzling effect.
14. The Squeegee Surprise (Squeegee Painting)
Messy but magnificent!
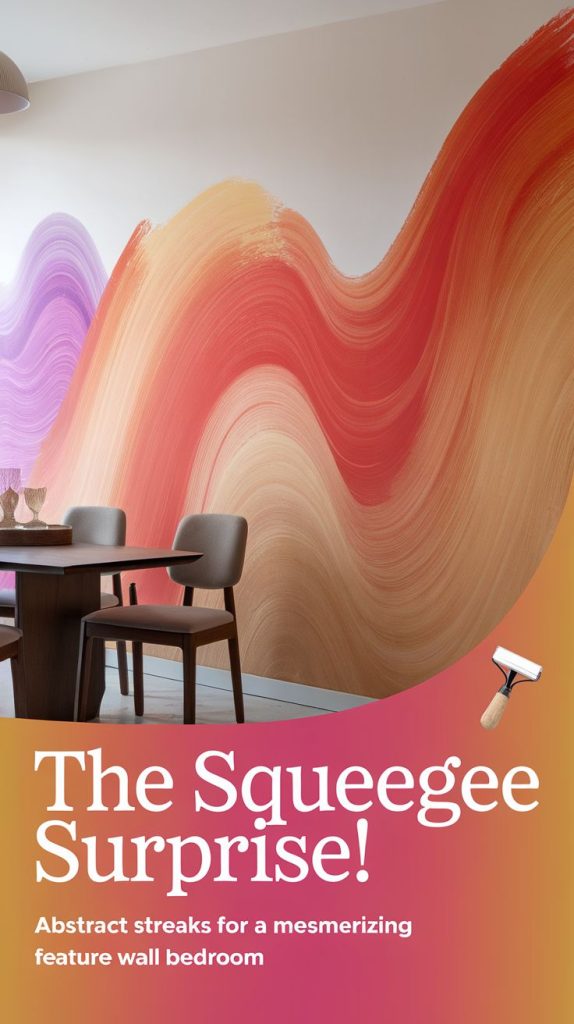
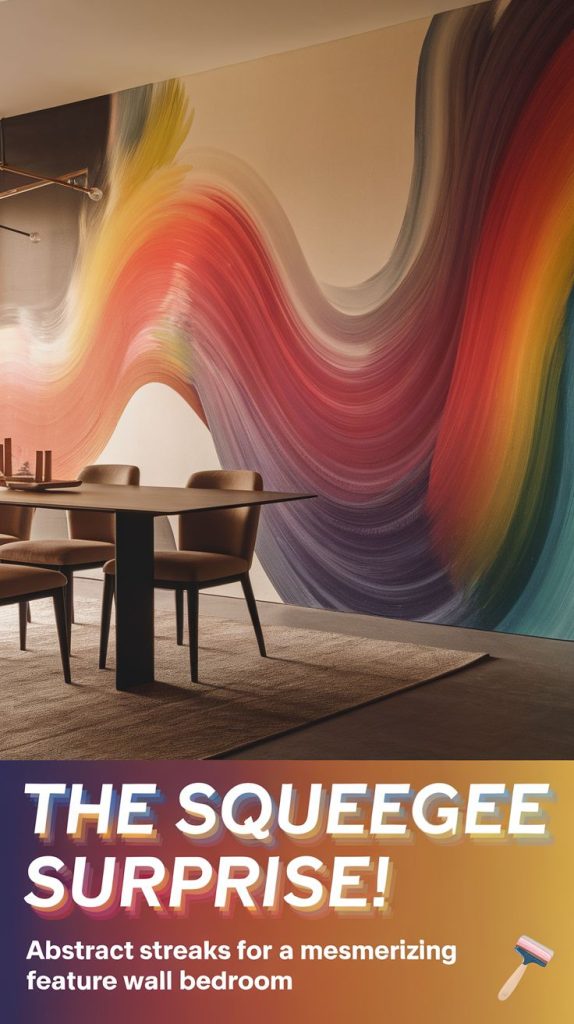
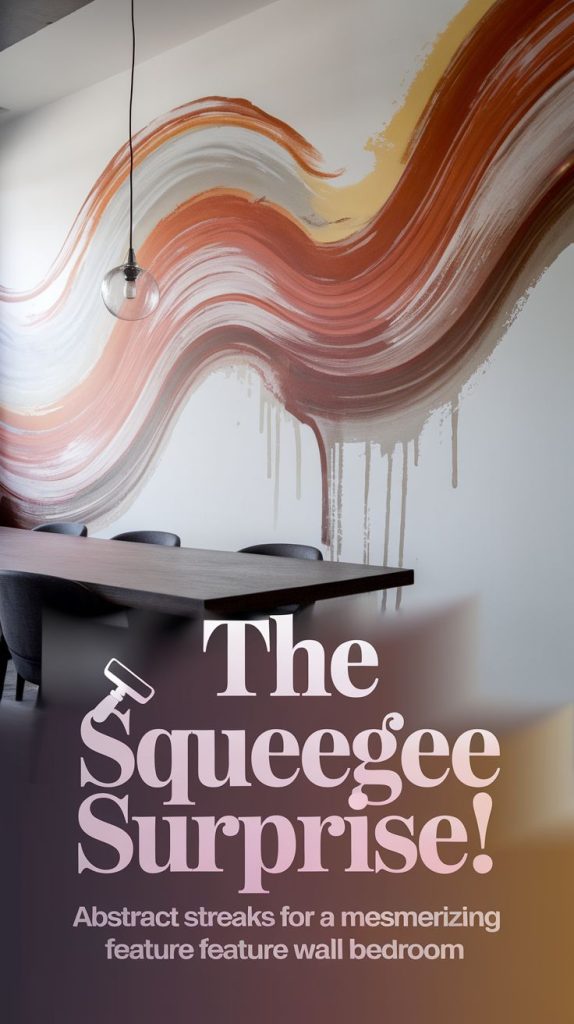
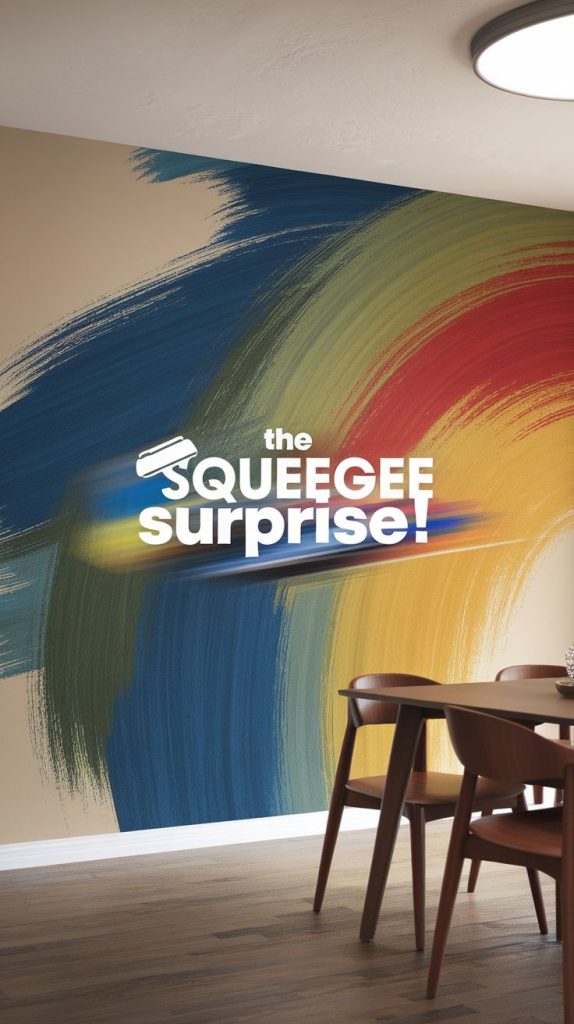
- What You’ll Need: A squeegee, multiple paint colors, and a sense of adventure.
- How-To: Apply blobs of paint at the top of the wall and drag the squeegee down to create streaks.
📸 Picture This: A dramatic wall that looks like a masterpiece of modern art.
🎨 Bonkers Tip: Layer different colors for a mesmerizing waterfall effect.
Final Thoughts
There you have it—14 bonkers DIY painting techniques to transform your walls from drab to fab. Whether you’re sprucing up a bedroom, dining area, or teen lounge, these ideas are sure to inject personality and pizzazz into your space. So grab your brushes, don your painting overalls, and let your creativity run wild!
Note: Always test a small area first and ensure proper ventilation when painting. Happy decorating! 🎨🔥